Filter
The filter should regularly be inspected visually without disassembling the filter cup.
Please note that the filter may have an almost invisible layer of biofilm that might require removal to ensure optimal functionality.
To clean the filter, first unplug the quick-connectors from the boom liquid system, then unscrew the filter cup and carefully remove the filter for cleaning with running water.
It is very important to wash the cup as well as the filter.
Avoid contamination of the filter cup inside, threads, gasket and quick-connectors, as debris/dust might end up damaging or clogging the nozzles. Wipe off the quick connectors before re-connecting them.
Contact your dealer or kilter support for ordering new filters.
-jpg.jpeg?width=465&height=620&name=Image%20(41)-jpg.jpeg)
-jpg.jpeg?width=507&height=380&name=Image%20(42)-jpg.jpeg)
-jpg.jpeg?width=512&height=384&name=Image%20(43)-jpg.jpeg)
Filter cup and gasket
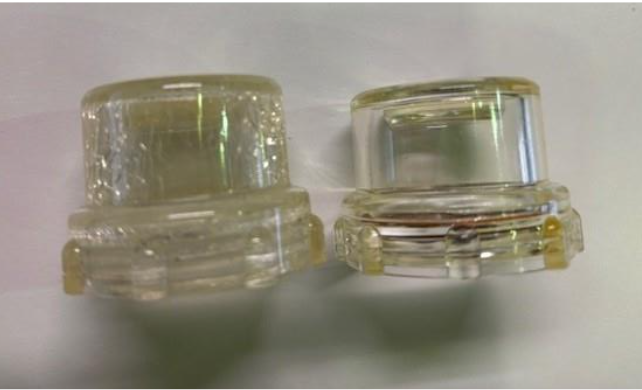
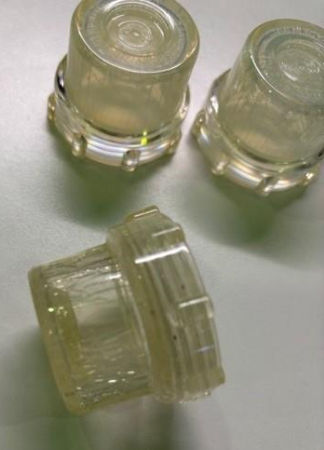
The cup shall be clear and without visible cracks.
In rare cases some herbicides might cause the filter cups to develop small cracks or whitening on the inside, the picture below shows the difference between a new cup to the right and a cracked one to the left. Cracks may cause leakage and prevent the gasket from sealing properly.
If your filter cup looks like this it should be replaced with a new one, including a new gasket.
If you see damages or permanent deformations on the gasket it should be replaced with a new one to avoid leakages.
Contact your dealer or kilter support for ordering new filter cups and gaskets.