Symptoms
1. The pump fails to draw herbicide from the main tank, even at full speed.
This occurred after the robot stopped due to the tank running dry, or after the machine had been turned off for some time without the pump being properly rinsed.
2. Sudden system pressure failure during operation. No leakage is detected, and the pump is running at full speed.Probable cause
The pump generates pressure through volumetric displacement. The three-chamber design includes a membrane that oscillates eccentrically. Due to the diaphragm check-valve system, liquid is drawn into and expelled from the chambers as the membrane moves. The pump cannot build up pressure if the diaphragm fails to seal properly. This can occur if particles become trapped between the membrane and the valve seat, causing internal leakage. Such particles may originate from debris, undissolved herbicide, or crystallized herbicide due to improper flushing after operation or unexpected shut down of the robot.
How to fix
- Check if all valves are in “normal operation” position.
- At least one spray unit must have the in and outlet hoses connected to the boom.
- If symptom 1 happens, try running a rinse procedure. This might create enough suction power to start flushing the pump and remove potential obstacles
- If step 1-3 does not solve it the pump must be dismantled for further inspection.
Dismantling the pump
- Make sure the AX-1 is powered off.
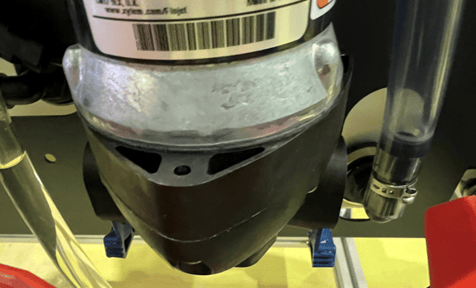
- Disconnect inlet and outlet hoses by pulling down the blue connection locks as shown below. This will release the angled hose barbs.
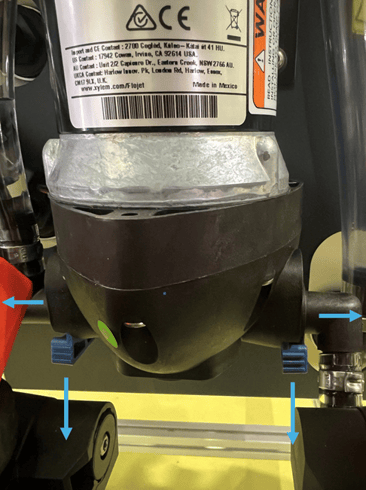
- Remove hoses from the pump.
- Disconnect pump connector
- Pull the red safety mechanism to the left.


- Press the locking tab and separate the connectors

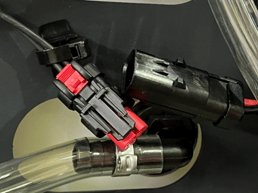
If necessary, cut the cable tie to release the pump connector.
- Pull the red safety mechanism to the left.
- Remove the pump from the wall by unscrewing the four M4 Torx screws (T20)
Note: Support the pump before loosening the final screw.
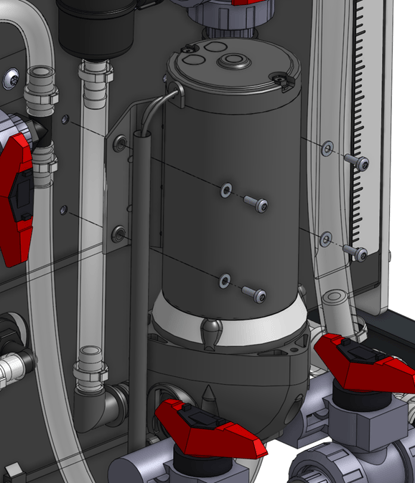
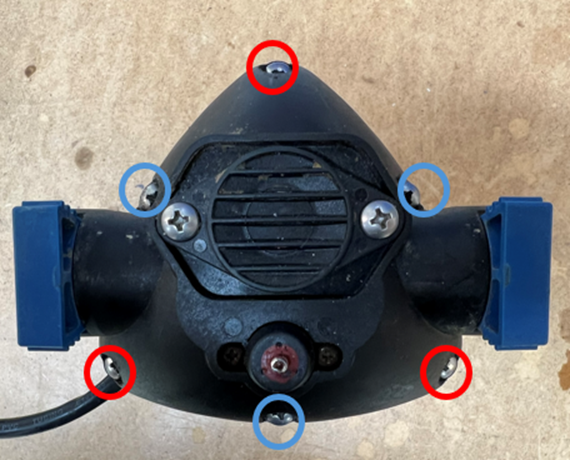
- Remove the six marked screws
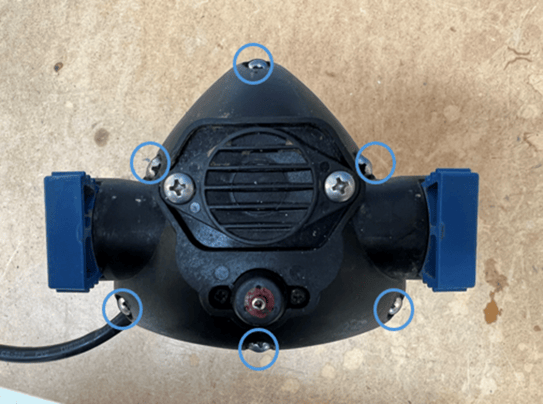
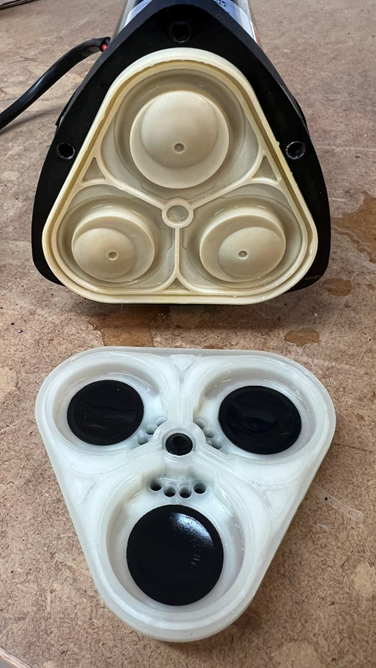
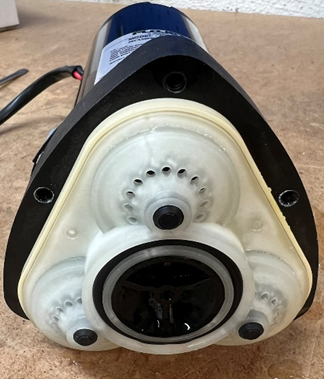
- Remove the housing by lifting it off. The Check valve assembly is now exposed

- Detach the check valve assembly from the diaphragm membrane by gently pulling it off.
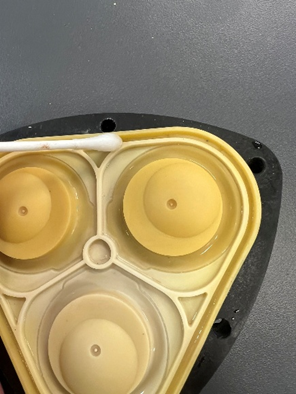
- Inspect the diaphragm membrane for damage and contamination. Rinse it with water and remove debris with a cotton swab if necessary.
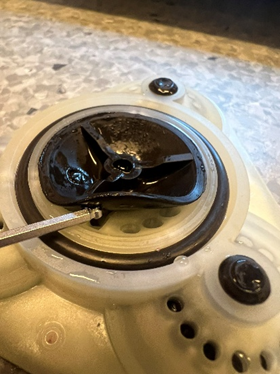
- Carefully inspect each check valve for particles that may prevent proper sealing between the membrane and the seat. Rinse thoroughly with water.

- Reassemble the pump. Place the check valve assembly back onto the membrane. Press along the edge of the assembly to ensure it is properly seated before reinstalling the housing.
- Tighten the screw marked with a red ring firmly.
Note: As the housing is made of plastic, do not overtighten.
- Tighten the M4 machine screw with blue ring around firmly.
Note: Apply a medium-strength thread-locking compound.
- Repeat step 1-5 in reverse order to reinstall the pump back on the machine.
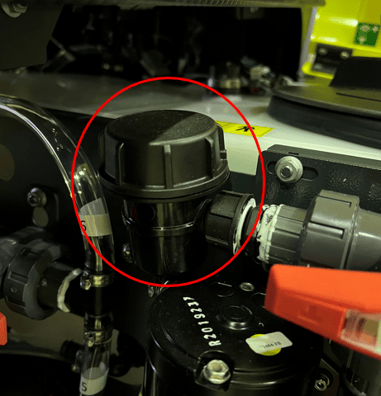
- Before starting the pump, inspect the main filter on the suction side. Ensure that is not damaged or clogged. Clean it if necessary and reassemble.
- Test the pump by running the machine in normal operation mode.
If the issue persists, contact Kilter support for further assistance. The pump might need to be replaced.